Author: Deanna
-
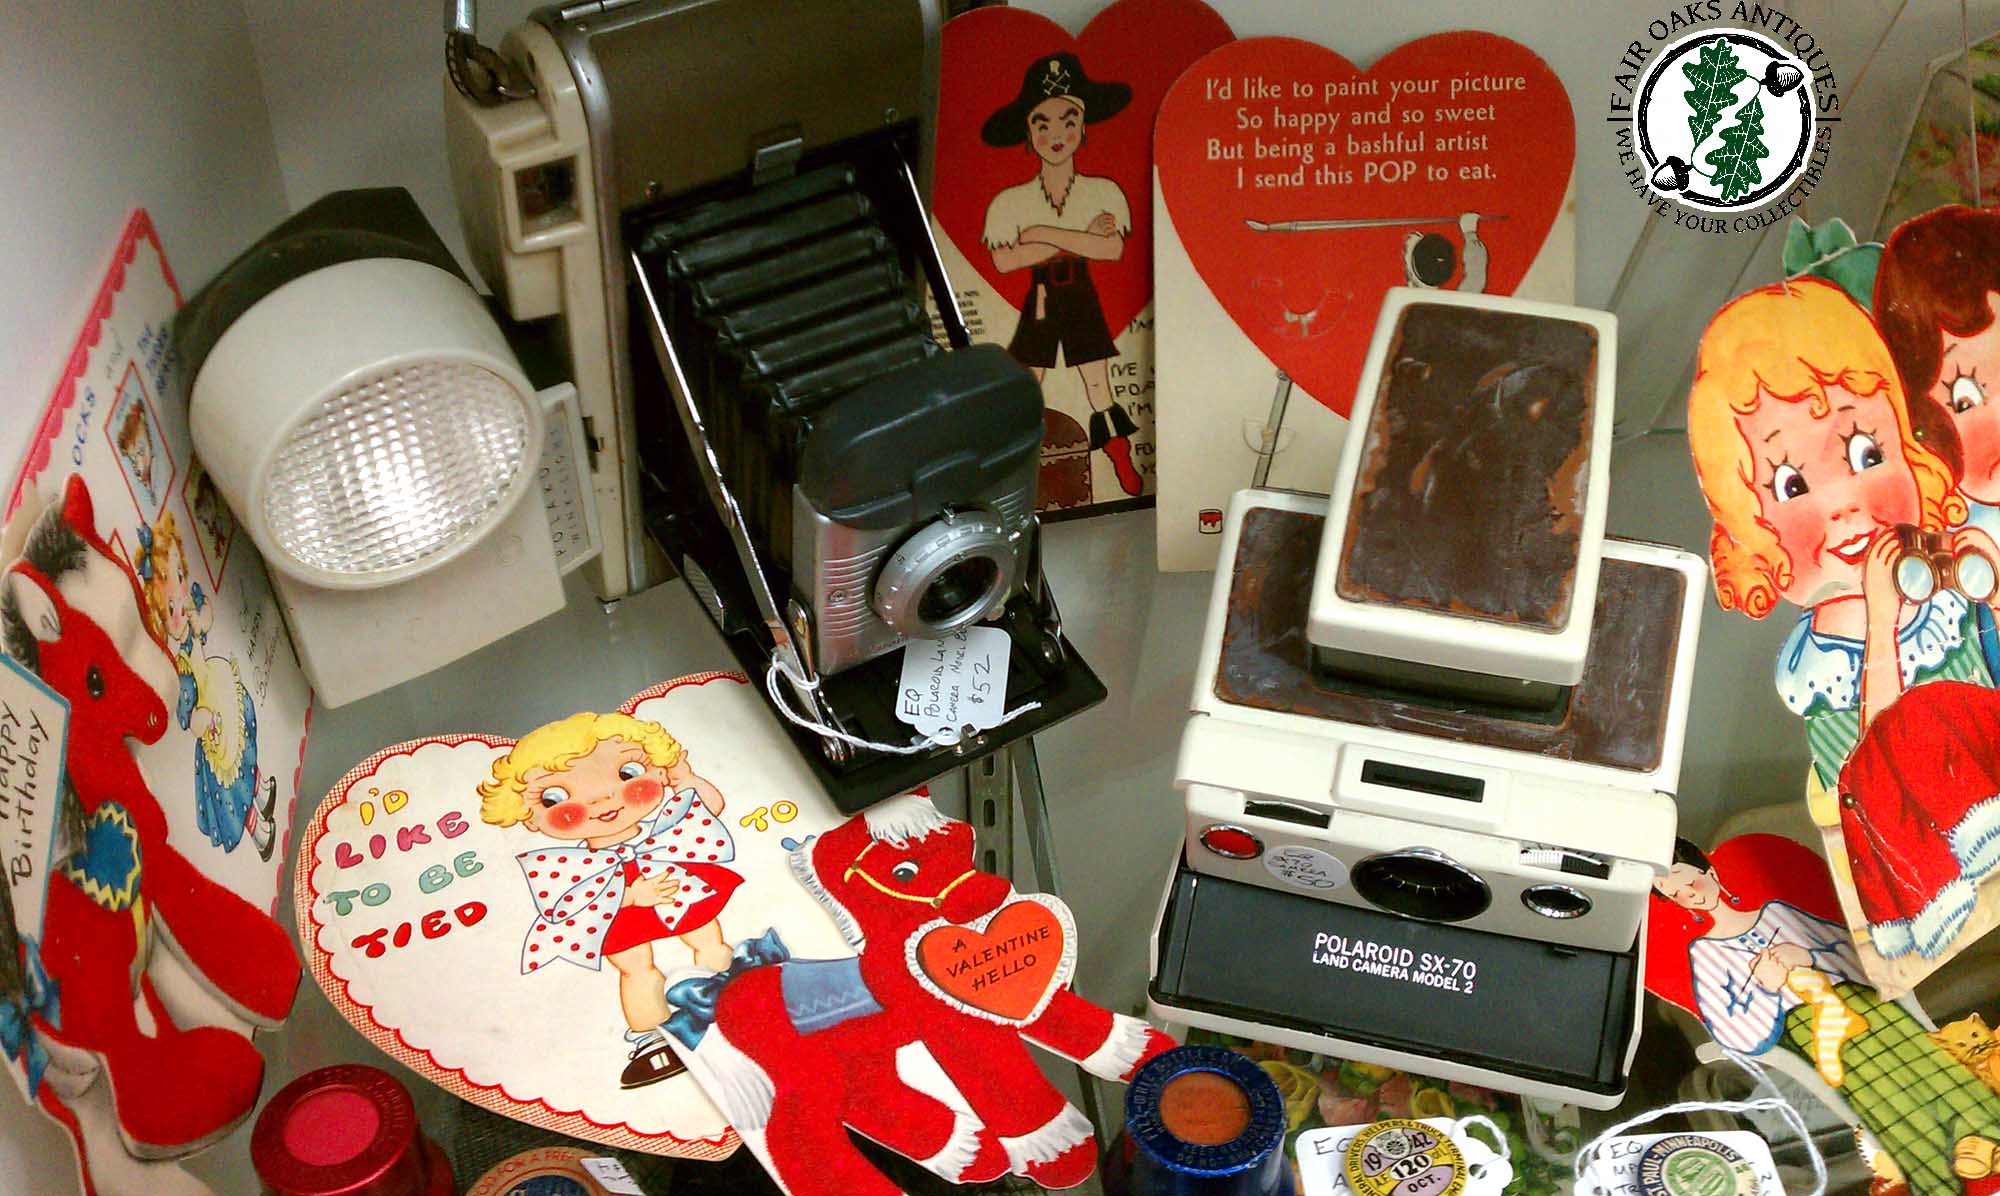
Celebrating Valentine’s Day With Romantic Antiques
Along with our booth space at Exit 55 Antiques we have a shelf in one of the cases near the wrap desk. For the holiday, we filled it with vintage valentines, antique candy boxes, vintage cameras, and a few other bits and bobs… Here are two of the antique mechanical valentines in action! We also…
-
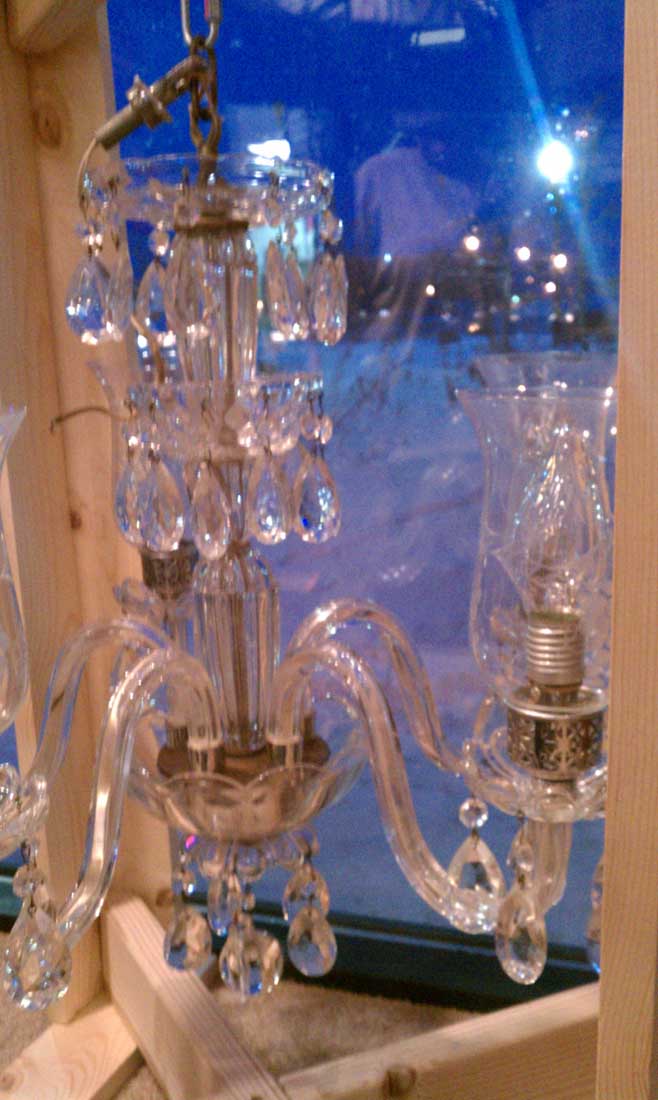
Antique Venetian Glass Chandelier
This is one of our latest — and grandest finds: An antique venetian glass chandelier. This antique fixture is entirely glass (not acrylic), including the arms, the original clear crystal prism drops (with an amazing round crystal ball drop hanging from the center of the bottom), and the hand-blown globes or chimneys are hand-etched with…
-
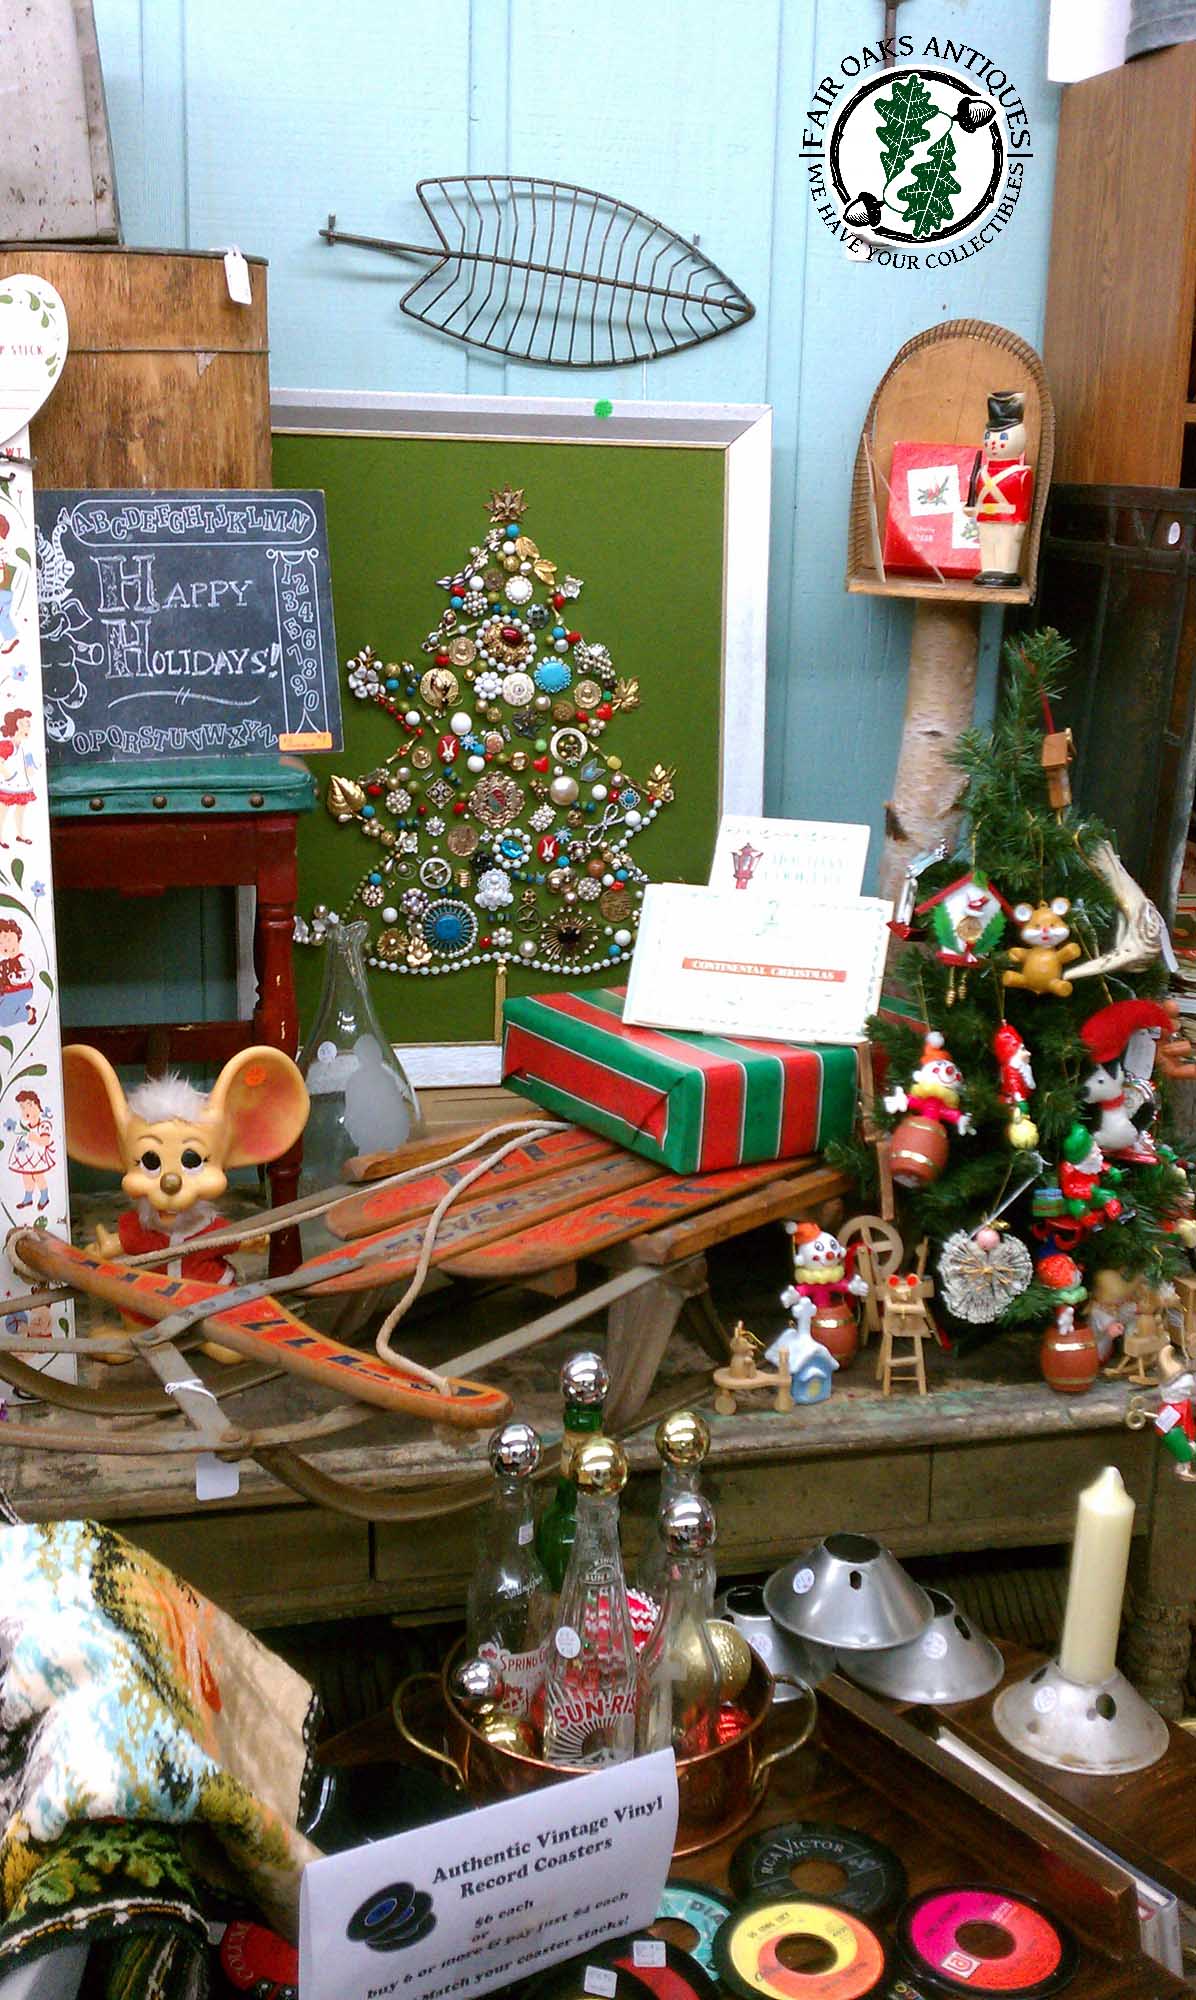
It’s Beginning To Look A Lot Like Christmas!
Because we have the window to decorate and display at Antiques On Broadway, I feel like we share a lot of those photos — but don’t share enough photos of our space at Exit 55 Antiques. So here’s a few photos to rectify that. This photo of our booth shows our nice (if we do…
-
December News For Fair Oaks Antiques
A few weeks ago, we changed our window display at Antiques On Broadway (from the back to school theme) to reflect the seasonal changes. Now the window features items to create a vintage and nostalgic holiday season, with a heavy emphasis on the kitchen, cooking, and baking. (Because no matter which holidays you celebrate, food…
-

How Now, Old Brown Milk Bottles
Just some of the old brown glass milk bottles we have available for sale. Like beer bottles, these bottles were made of brown or amber glass to protect the contents from the deterioration of sunlight. Glass milk bottles are not too common; and these amber ones are even more rare. They have neat old dairy…
-
Halloween & Other Collectibles Articles For October
I’ve been busy with articles again this month, including Collecting Halloween: The history of Halloween postcards and costumes at Collector Perspectives. UPDATE: Article is now here. I’ve also written a four-part series on Sewing Pattern History: Part One, Part Two, Part Three, Part Four. Meeting in the middle, there’s also a brief note on antique…
-
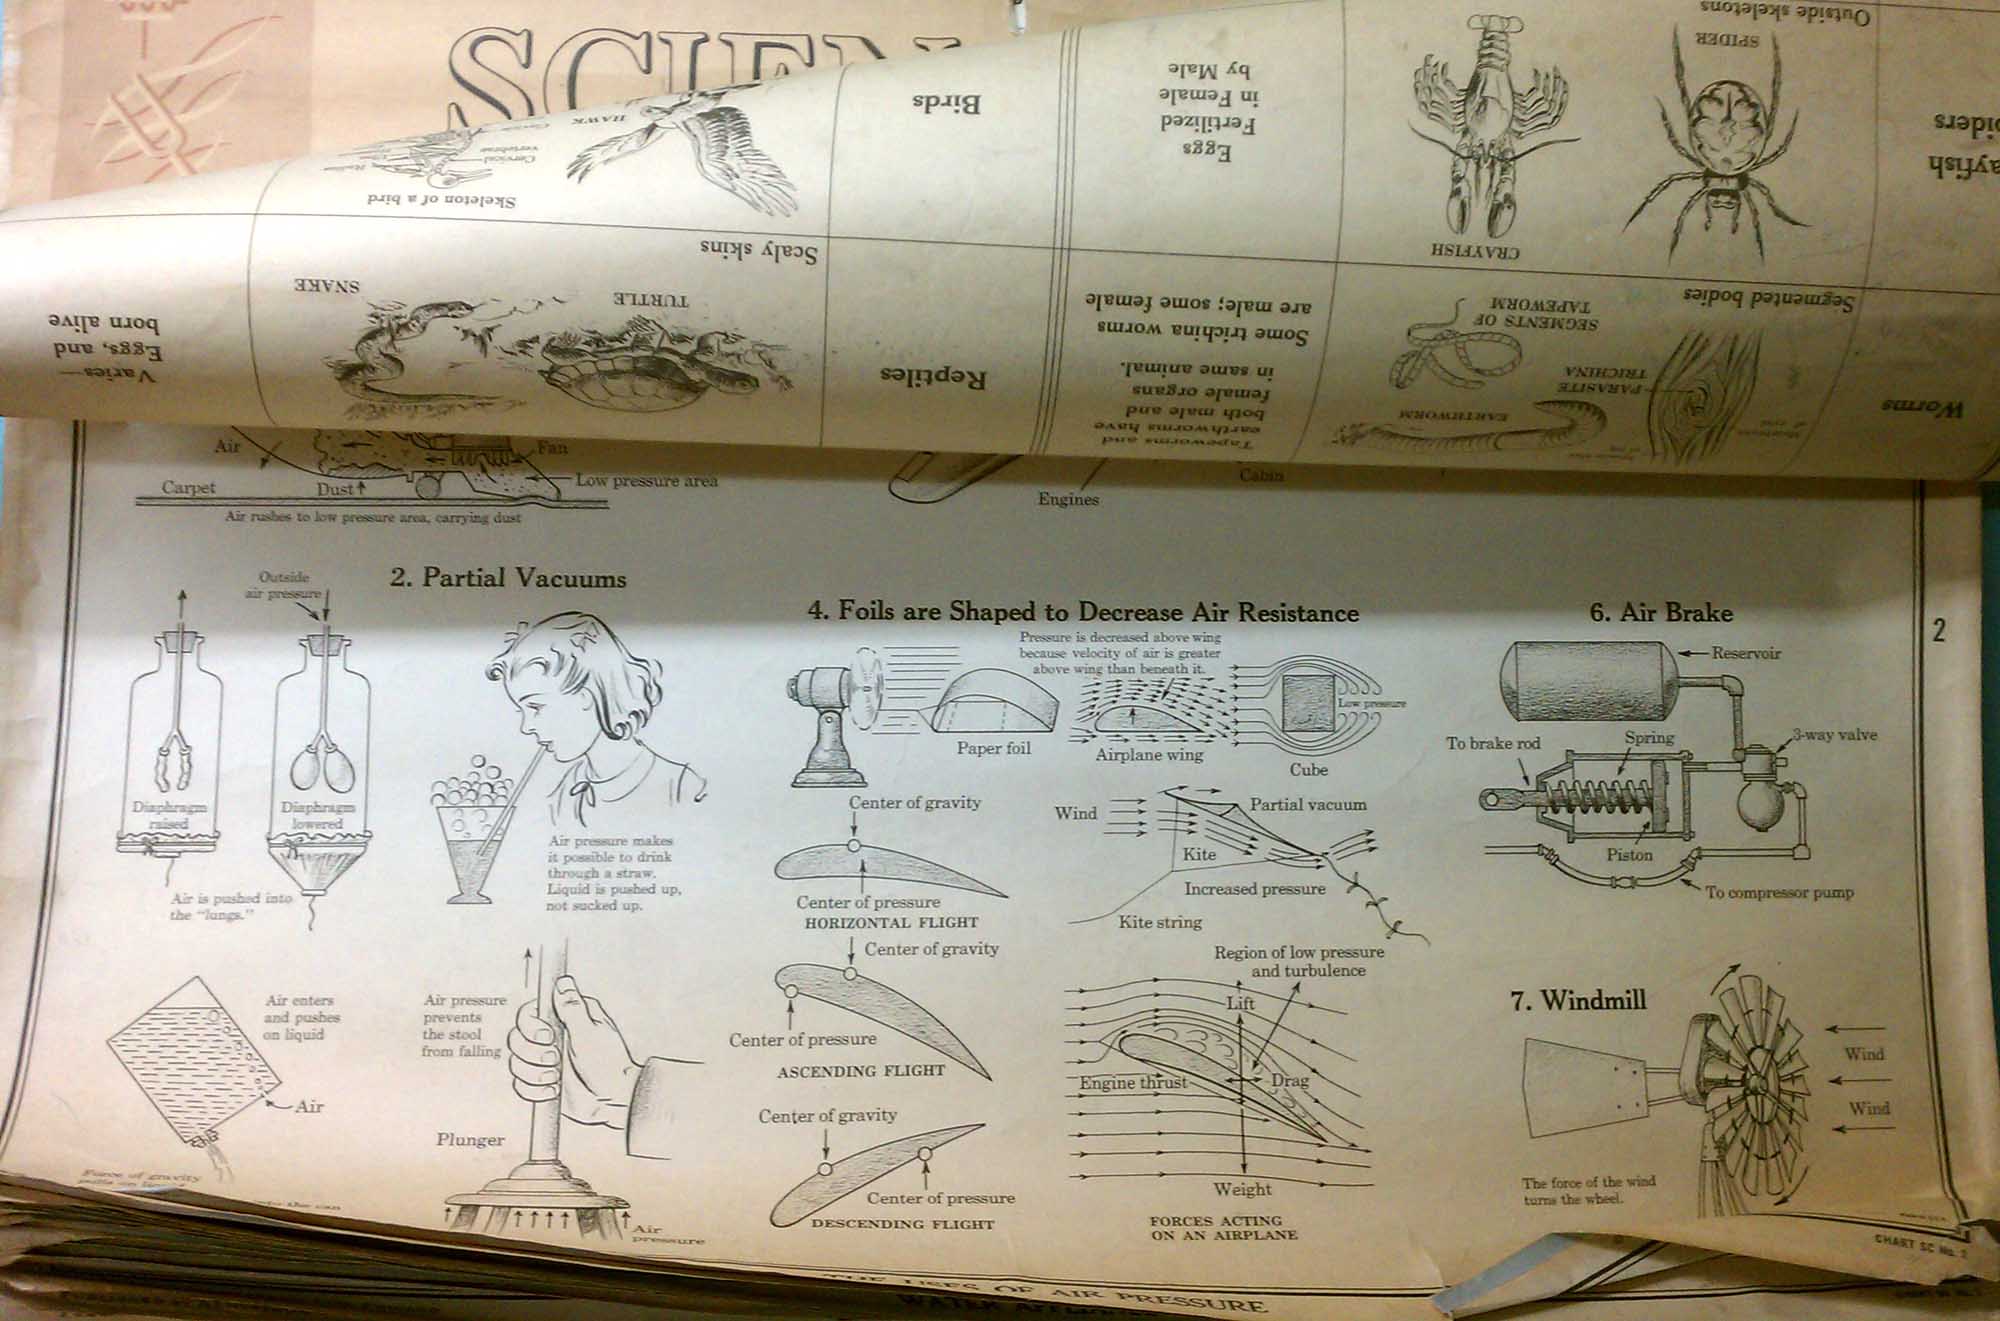
Flipping-Out Over Vintage Science Charts
One of the rather spectacular items in our Back To School window display at Antiques On Broadway is this vintage set of Science Charts by A. J. Nystrom & Company of Chicago. Consisting of 16 double-sided flip charts (bound in a metal mounting), each page is heavily illustrated with a different science lesson for classroom…
-
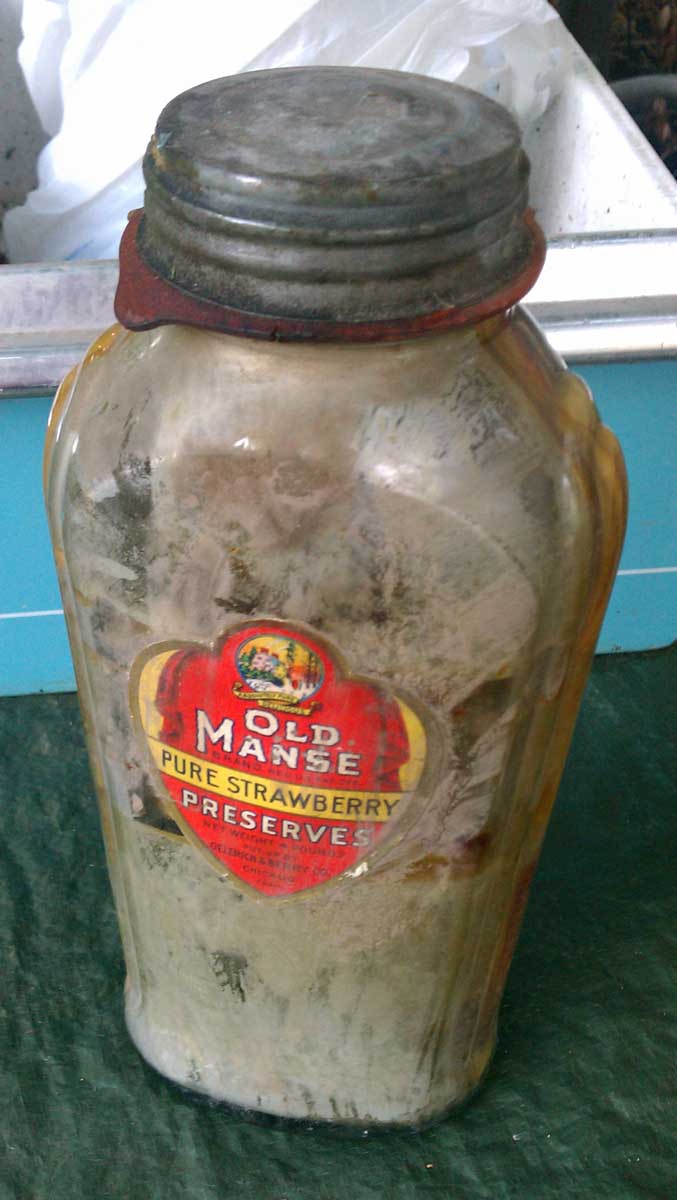
Preserving The Integrity Of An Old Glass Preserves Bottle
Sometimes I fall in love with things — to the point of obsession, or, as the hubby would say, to the point of stupidity. *wink* Today’s example is an old preserves jar. I knew that whatever was in this old glass jar was not a “good thing,” but somehow the metallic silver tone still sparkled…
-
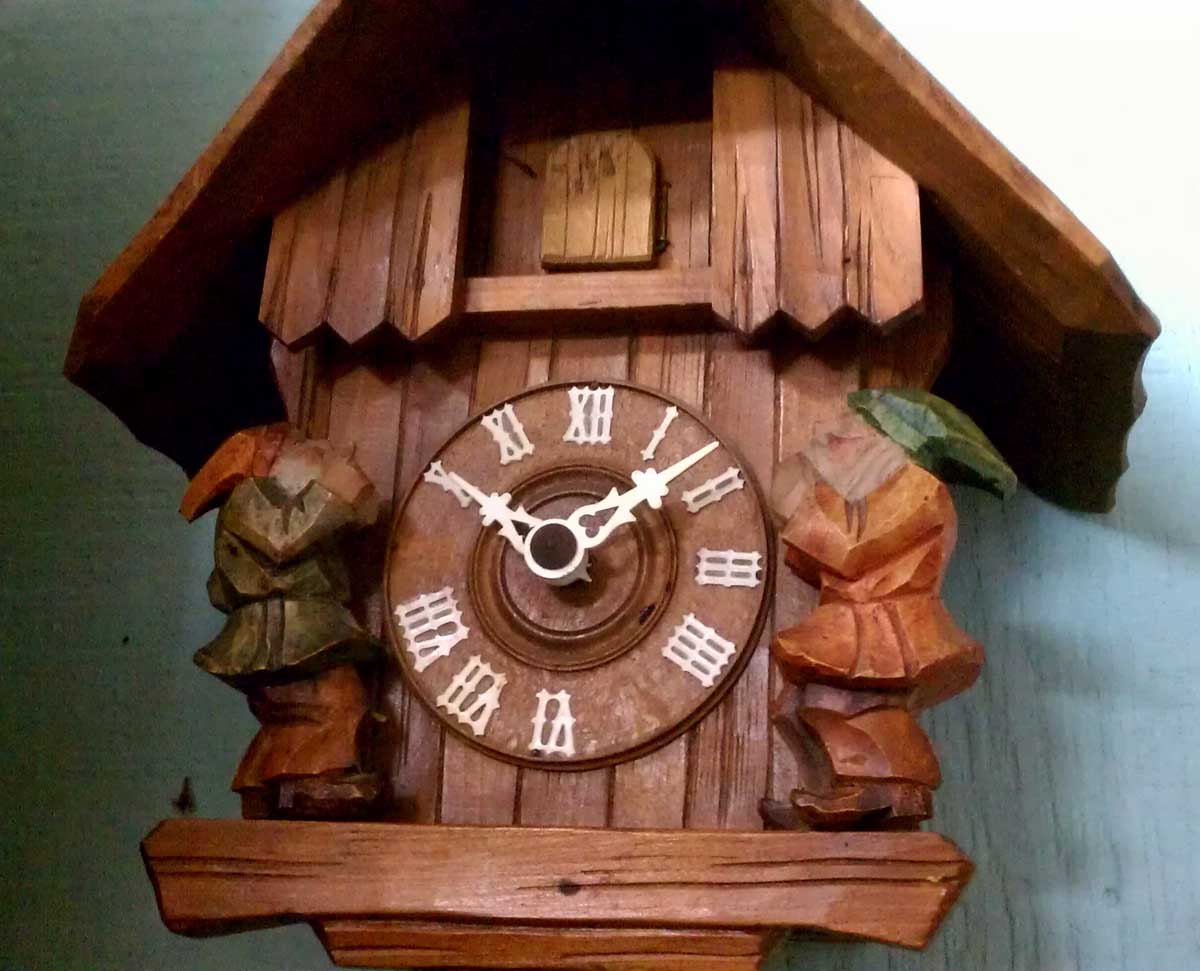
Cuckoo For Old Cuckoo Clocks
Just a darling little vintage (nearly antique; circa 1930s) carved wooden cuckoo clock from Germany (or Austria) — just look at the the clock face framed by a pair of gnomes! Measures 10 inches tall; 9 inches wide (at the widest point of the roof), 5 inches deep. And, as you will see & hear,…
-
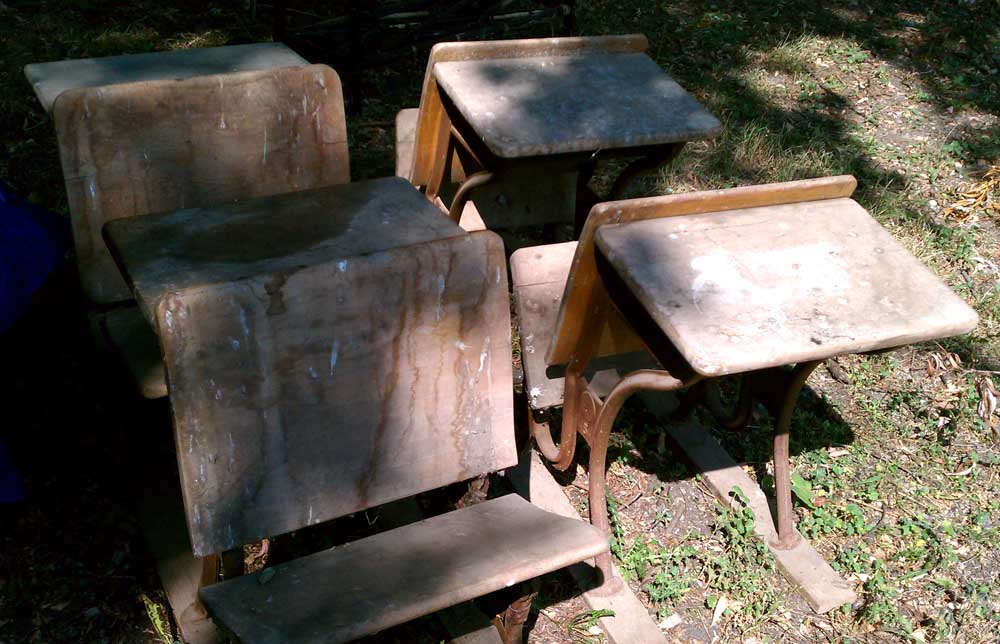
Antique School Desks: Back To Antiquing Basics (Or How To Clean Antique Furniture)
While hubby and I thrill to go pickin’ for antiques in barns, there’s more than a little work involved in dealing with the not-so-nice side of “farm fresh”. “Farm fresh” really is an oxymoron; for the reality is that these items are typically covered in all sort of “ick” — like bird and animal droppings,…