Tag: picking
-
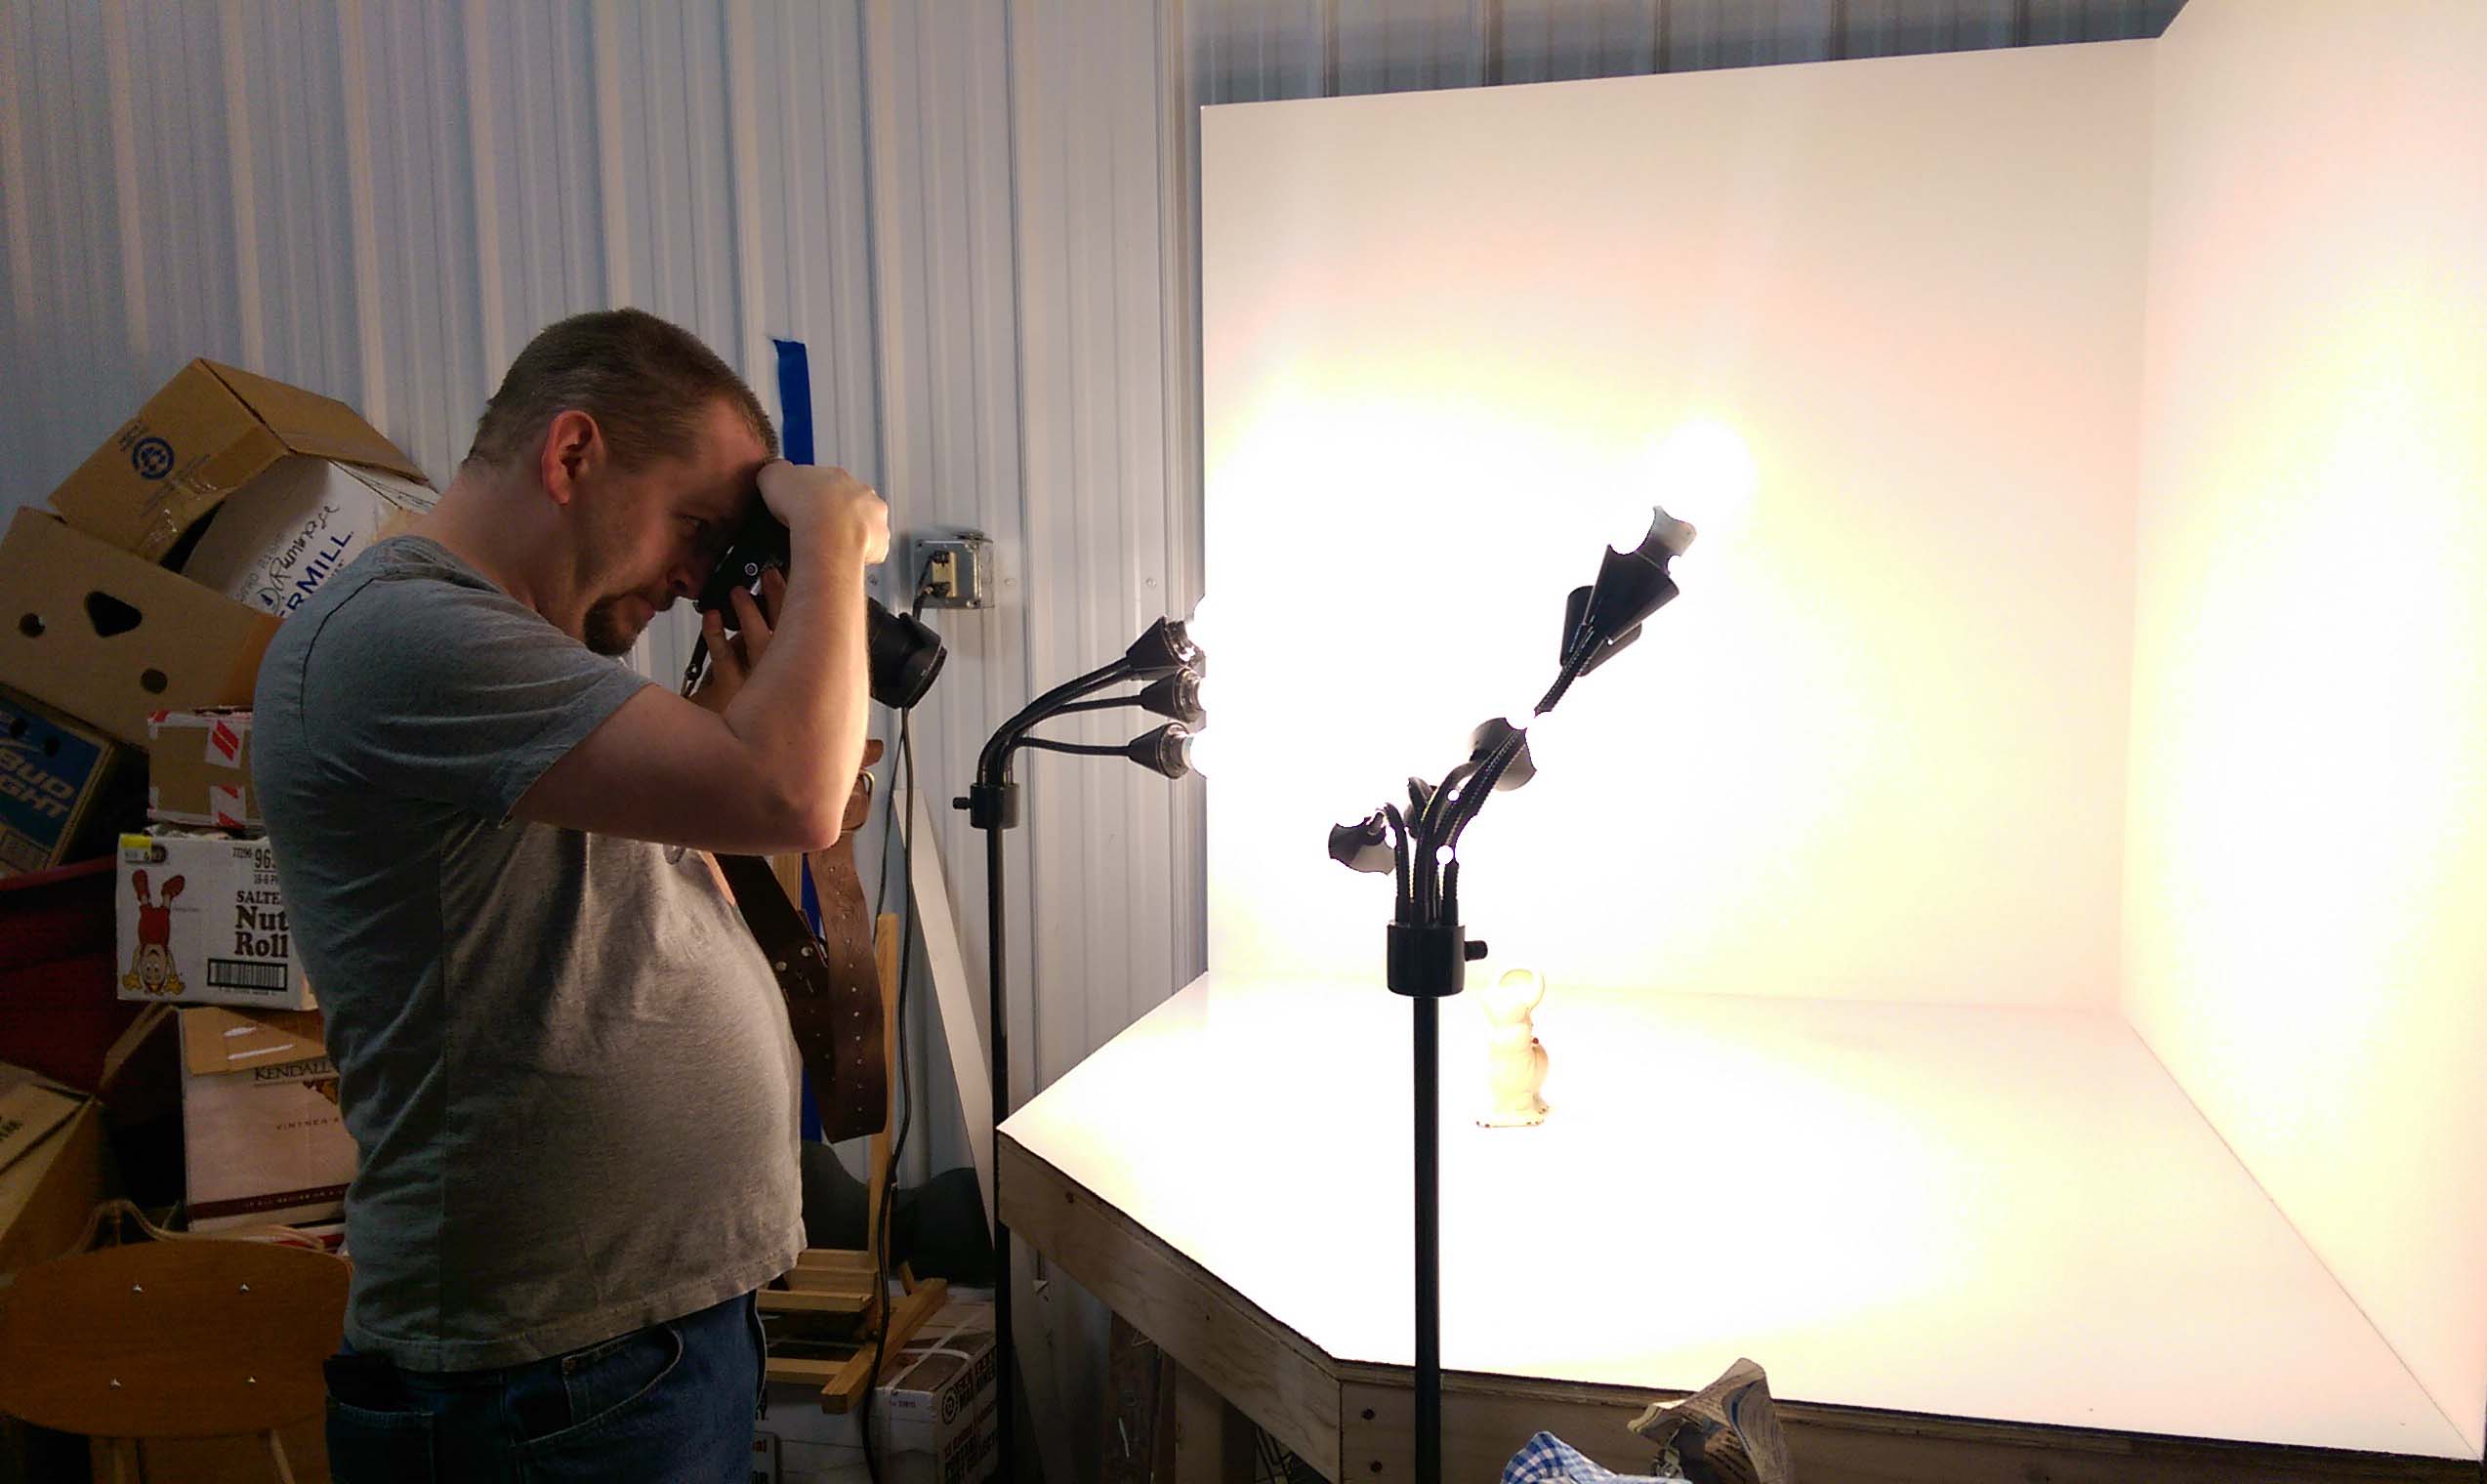
A Tour Of Fair Oaks Antiques Workshop
Workin’ in our own workshop today — it’s equal parts storage, office & shipping headquarters, photography studio, and workshop or creative space. Just like us, this space is put to many uses! Since Antiques On Broadway closed, and we left Exit 55 Antiques, this is where we spend most of our work time. (If you…
-
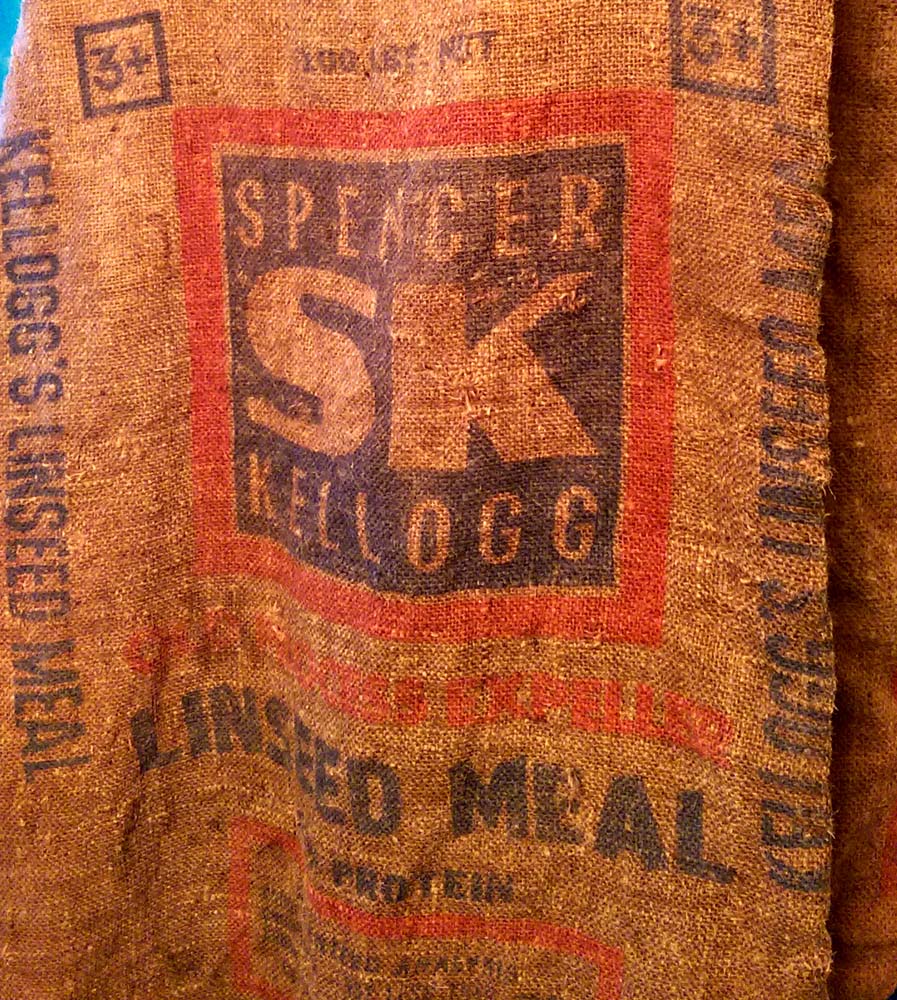
How I Spent My Afternoon: Cleaning Old Feed Sacks (A “How To” Guide!)
As noted before, “farm fresh” is often an oxymoron. Things found in barns are usually anything but fresh. Today’s example, a number of old feed sacks — burlap feed sacks, to be precise. While the graphics can be real beauties, they lie beneath layers & clumps of stuff that is not so beautiful and smells…
-
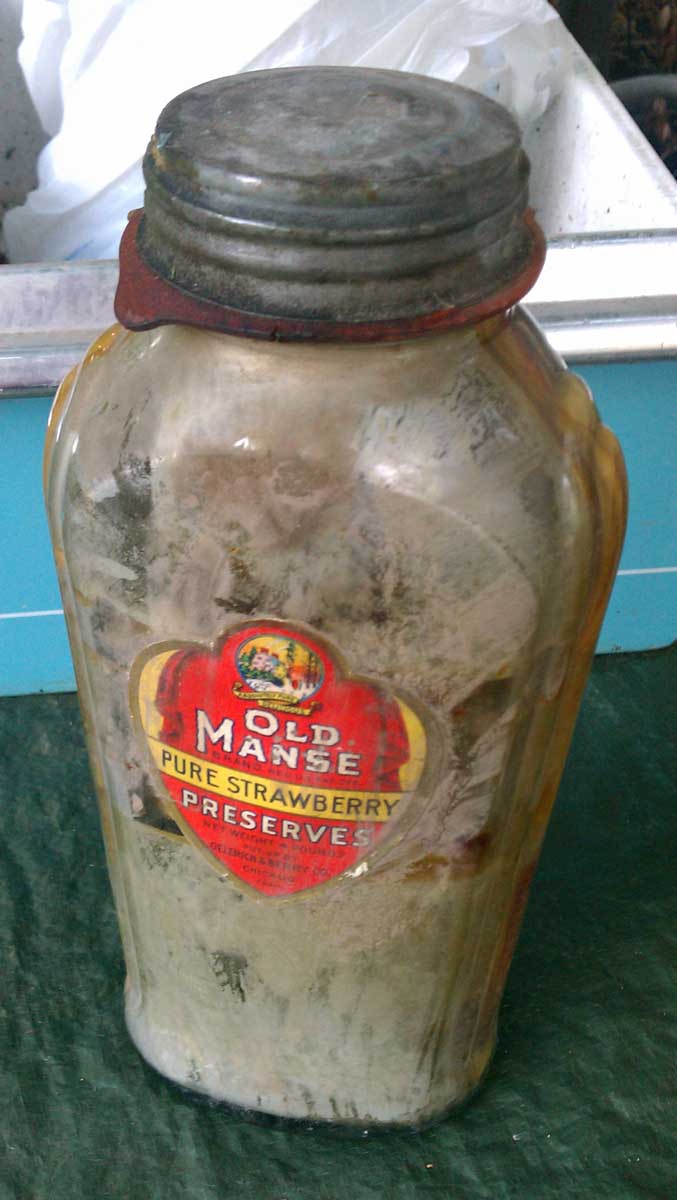
Preserving The Integrity Of An Old Glass Preserves Bottle
Sometimes I fall in love with things — to the point of obsession, or, as the hubby would say, to the point of stupidity. *wink* Today’s example is an old preserves jar. I knew that whatever was in this old glass jar was not a “good thing,” but somehow the metallic silver tone still sparkled…
-
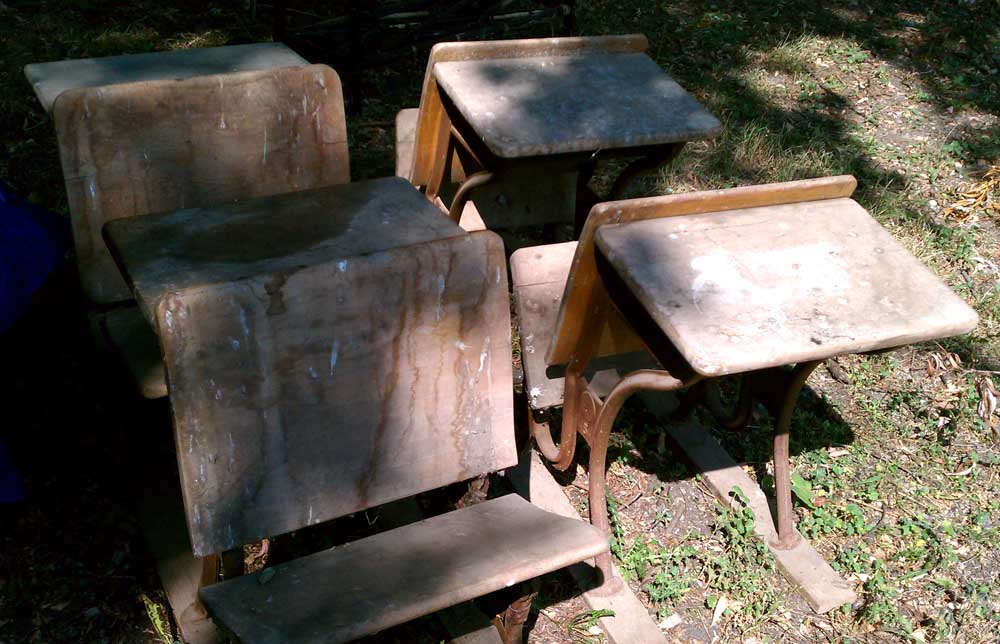
Antique School Desks: Back To Antiquing Basics (Or How To Clean Antique Furniture)
While hubby and I thrill to go pickin’ for antiques in barns, there’s more than a little work involved in dealing with the not-so-nice side of “farm fresh”. “Farm fresh” really is an oxymoron; for the reality is that these items are typically covered in all sort of “ick” — like bird and animal droppings,…